Installing an extractor fan isn’t complicated and, as long as you follow the instructions, there are minimal risks.
What is an extractor fan?
It’s a device that gets rid of steam, smoke, and nasty smells from a room.
It’s very efficient at removing excessive moisture and can help prevent the onset of damp.
In installing an extractor one thing to always keep in mind is to never, ever cut corners!
Tools you’ll need:
- A circuit breaker
- A circuit tester
- Electrical Wire
- An electrical Screwdriver
- Plaster
- A chisel
What Size of Fan Should I Use?
The fan you choose has to have the perfect rate of extraction and be right for its location. Some fans, for example, need to be placed halfway between the exhaust vent and the intake like, for example, in-line fans.
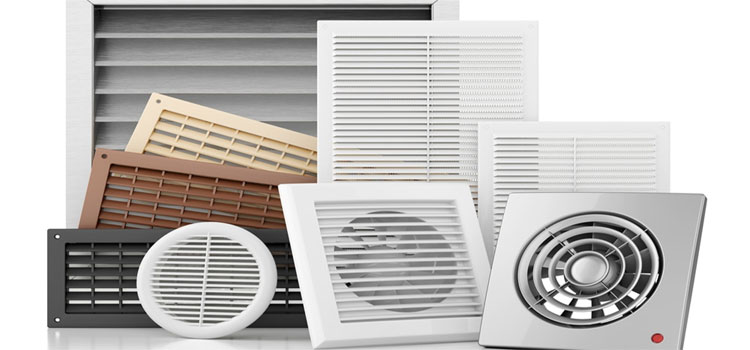
There are three main types of bathroom extractor fans: centrifugal, axial, and inline. The axial isn’t just as powerful as the other two but still has enough power for most uses.
Ideally, you’d never duct your fan any more than 2-3m, any further would involve a move to the centrifugal extractor which is more powerful, more efficient, particularly in larger rooms but much noisier. The centrifugal fan is mostly used in situations that require longer ducting – commercial or industrial buildings.
An inline fan can be either centrifugal or axial and is generally placed in the attic space just above the ceiling.
Inline extractor fans tend to be more powerful than centrifugal fans and deliver high performance over long distances.
*No matter what fan you decide on, always follow the manufacturer’s guidelines*.
Installing an extractor fan:
- Figure out the CFM rating(cubic feet per minute) which is a measure of airflow for a room.
- Take into consideration the sound rating of the fan to be installed (this is measured in sones). Current fans range between 0.5 sones (quiet) to 6 sones (loud).
- You’ll get the best from your fan if you position it somewhere between the shower and the toilet. For bigger bathrooms, it’d be worth considering an extra fan.
The attic space in the house is crucial – the extractor fan has to be positioned between two joists, in an area that has no obstructions or pipes.
If you’re replacing an old model, your best option is to install your new fan in the same position.
What You Need:
- power drill
- Pad Saw
- combination pliers
- Screwdriver
- Screws
- flexible duct pipe
- vent cap
- caulk and wire nuts/connectors
To Get The Job Done:
- External grill
- Fan
- Flexible pipe
Our Suggestions:
This is purely for ideas and reference:
Take into consideration the layout of your property, this will have a huge bearing on how you decide to install the extractor fan.
On to the installation of Extractor Fan:
- Drill a hole which will be your reference point and then make a mark on the ceiling for the reference hole (positioned where you’re installing the fan)
- Use a power drill with a 1.9cm or 3/4 inch spade drill bit.
- Measure the vent housing for the fan
- Find the reference hole in your attic space and clear away the insulation.
- Use the fan housing measurements to make sure that the extractor fan will fit where you need it to be positioned.
- Take a measurement of the intake port of the fan to ensure that the hole you cut in the ceiling is accurate.
- With a framing square and pencil, mark the outline of the extractor intake port on the ceiling with your measurements.
- Cut the marked part of the ceiling away using a padsaw. Ideally, you use a jigsaw but if it’s not available then a suitable alternative is a drywall/reciprocating saw.
- Make sure that the rectangular piece of the ceiling is supported (it can be done with your free hand) and placed on the floor.
- Put the fan in place but, making sure that before you lower it into the hole that you connect a 90-degree duct elbow, (later you’ll secure the duct pipe to this) to the correct outlet port using foil duct tape.
- Using the knockout hole at the side of the extractor fans housing, insert a cable.
- Put the supporting brackets in place.
- Center the fan over the hole in the ceiling and gently lower, making sure that all connection points are aligned correctly.
- Joist attachment – when you’ve positioned your fan to extend the metal brackets until they reach the attic joists securing the extractor to the joists
- Position the extractor and then bring the brackets out to meet the joists.
- Now that the fan is secured attach one end of the flexible duct tape to the 90° duct elbow with the foil duct tape (This would be a good time to put a new or existing electrical cable through the connector on the fan housing. Tighten the screw on the connector to attach the cable *if your fan also has a light you will have to use a 3-wire cable).
- Finding the right outlet point for the duct pipe – This will be the shortest and most direct path from the housing fan to the outside of the property. A longer duct pipe will mean a less efficient fan. (The fan exhaust has to be vented outside, venting inside would cause mold, leading to potential rot).
- Attaching your vent cap – choose a point between two wall studs for an outlet point. Using reference measurements from inside the property find the exact same position on the external wall. Cut through your wall from the outside with a 4-inch hole saw and put the vent cap securely in place. The end of the duct pipe needs to be attached to the vent caps connector duct inside the attic using foil duct tape.
- Wiring your connections in the housing unit – You might have to wire the connections either from the attic or the bathroom dependant on which type of fan you’ve chosen. Make sure you read the instructions and ensure that your power supply is switched off before going any further.
- Nearly there! Next, you attach the grille. Then plug the blower motor in and secure with screws (usually provided)
- Put the mounting wires of the decorative plastic grille into the slots of the housing unit, always ensuring that it’s flush against the ceiling.
- Switch your power on again and test the extractor to ensure that it works.
*We recommend getting a registered professional to do any electrical work*
*Quick tip*
Unless the flexible pipe is fitted correctly it can become a moisture trap which will eventually lead to a water build up. When your flexible pipe is supported and is tight enough this won’t be an issue so where possible always go with solid piping.