A bolt should clamp parts together and stay there. Yet the joint rattles, the nut backs off, and the whole thing feels shaky again. The fix isn’t magic. It’s about how the joint makes and keeps squeeze—also called clamp force. Once that clicks, the reasons for a loose joint are clear, and so are the fixes.
How does a bolt work?
A bolt works because it stretches a tiny bit when tightened. That stretch pulls the parts together and creates clamp force. Friction between the parts resists any sliding. The bolt must be pulled tight enough to tighten the nut and bolt. If this is not done, the surfaces will move and the friction will decrease due to the movement. It becomes like a loop and the joint gets loose with every cycle.
Size and surface matter. A clean, flat, de-burred hole helps parts sit flush. A washer spreads the squeeze so the head and nut don’t dig into soft material. The right drill size stops the hole from being sloppy.
What causes loose bolt joint?
Most loose joints trace back to a few mistakes. The bolt was not tightened enough to stretch. The hole was oversized and let the parts slide. The parts were soft and settled under load, so clamp force faded. The joint vibrated and the nut backed off. Threads were oily one time and dry the next, so the torque number didn’t match the clamp. Rust crept in and ate the strength. Temperature changed, one part grew more than the other, and the squeeze dropped.
Thread engagement matters too. A nut needs at least one full bolt diameter of thread to hold well. Less than that and the threads strip or tilt. Mismatched grades also cause trouble. A hard bolt with a weak nut can chew the nut. A high-strength bolt in thin sheet can crush the sheet when tightened. The joint fails even though the bolt is “strong.”
How you can prevent bolts from loosening
1. Match the bolt to the job
Grades tell you how much stretch a bolt can handle before it gives up. The most common grades used are 8.8, 10.9, and 12.9. In imperial, you’ll see Grade 2, 5, and 8. Higher numbers mean higher strength, but more strength is not always better. The joint must be able to take the squeeze without crushing. For thin brackets or soft alloys, a mid-grade bolt with a washer often wins over the hardest bolt in the box.
Head shape also matters for real work. A six-sided head gives solid tool contact, gets into tighter corners, and makes controlled tightening easier than small drive heads. For general frames, brackets, and gear repairs, Hex Head Bolts are a simple pick that balances strength, tool grip, and easy service later.
2. Tightening that actually works
Torque is how you turn the bolt; clamp is what holds the parts. Torque leads to clamp because turning overcomes thread friction and stretches the bolt. But friction changes with oil, dirt, and coatings, so the same torque can produce different clamp loads. When a torque wrench is available, use it and follow the chart for the bolt size, grade, and condition (dry or lubricated). When there’s no torque wrench, use a steady approach. Snug the joint so parts touch, then add a measured turn—often a quarter turn on small bolts and a bit less on larger ones. Mark the head and the part with a paint line. If the line moves, the joint moved.
Tighten across a pattern when a part has several bolts. Go from one side to the opposite side so the squeeze grows evenly. If the clamp is uneven, a small gap is left at one end. When a load is applied, this small gap becomes a slippery path and the joint becomes loose.
Washers are not decoration. A flat washer under the head and nut spreads load and saves the surface. A flange bolt has that built in. Avoid thin, sharp washers that bite and gouge the part; those can relax under load. Spring washers often don’t add real hold in high-vibration joints. A better plan is proper clamp, a wider bearing surface, or a locking method that stays engaged.
3. Stop vibration from winning
Vibration tries to make the joint slide. Once sliding starts, clamp falls off, and the nut can rotate. The answer is to stop sliding before it begins. First step: reach proper clamp by tightening correctly. Second step: add a lock that doesn’t rely only on friction.
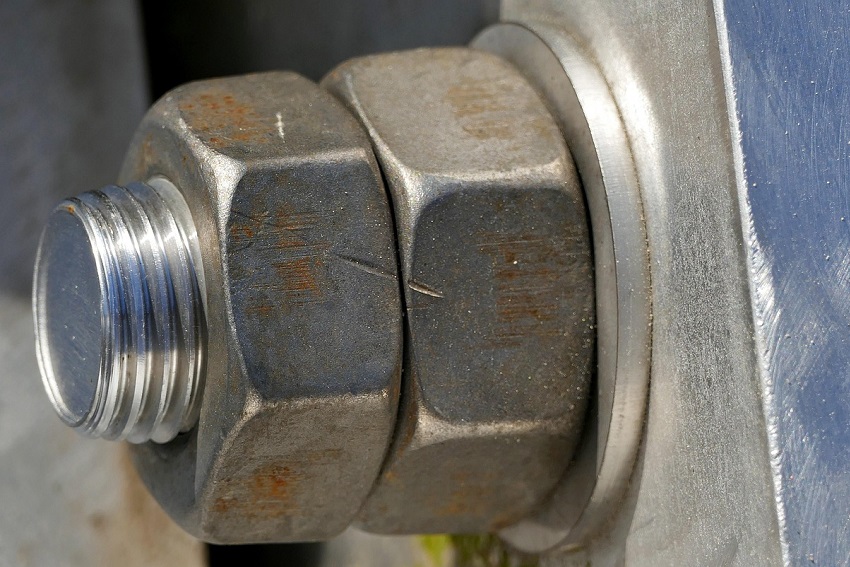
Nylon insert nuts (often called Nyloc nuts) add resistance in the threads. They’re good for moderate heat and repeated use. All-metal lock nuts handle more heat and don’t age. A prevailing-torque nut stays snug even after the bolt relaxes a little. A second nut (jam nut) can help in tight spots—tighten the inner nut first, then hold it while locking the outer nut against it.
Threadlocker works too. Use a medium-strength grade for parts that may need to come apart with hand tools. High-strength grades are for joints that shouldn’t move unless heated and reworked. Make sure threads are clean before applying it, or it won’t cure well.
When the base material is or becomes thin, it is a good idea to place a backing plate behind the hole. Spreading the clamp over a bigger area raises friction and reduces movement. Shorten long, bendy joints where possible; a stack of soft spacers squishes and relaxes. If a hole must be slotted for adjustment, clamp a small serrated plate across the slot to hold position once set.
4. Keep rust and gunk out of the joint
Corrosion attacks two things: the bolt’s cross-section and the smooth contact between parts. Both reduce clamp. Pick a finish that matches the environment. Zinc-plated steel fights light rust indoors. Hot-dip galvanised hardware suits rough outdoor use. Stainless resists rust well but can gall, which is where threads seize. A tiny smear of anti-seize on stainless helps, but remember this changes friction, so torque should be lower for the same clamp.
Watch for dissimilar-metal contact. Steel against aluminium in a wet place can kick off galvanic corrosion. A nylon washer, paint, or a thin sealant layer can separate them. Keep water from pooling around the joint. A drain path or a small notch often makes a big life difference.
Dirt under the head or nut acts like ball bearings. Clean the surfaces. De-burr the hole so the head sits flat. If paint is planned, paint after drilling and de-burring, then re-clean the hole edge so the fastener bears on solid material.
5. Fit and alignment matter
A bolt is not a peg to fill a big gap. If the hole is too large, the parts can shift before clamp builds. Use the correct drill size. For precision parts, consider a close-fit hole and a short, smooth shank section under the head (not full threads in the shear zone). Keep parts aligned so the clamp acts straight through the joint, not at an angle.
Soft layers creep. Rubber pads, foams, and plastics can compress over time. If those must be in the stack, use a sleeve or a spacer that sets a firm limit on how far the joint can crush. That keeps clamp from fading as the soft layer settles.
6. Simple checks that make a big difference
Before tightening, dry-fit the parts. Do they sit flat with hand pressure? After tightening, mark each bolt and the part with a paint line so movement shows up later. After a day of use, re-check the marks. If any moved, re-tighten and look for the cause: gap, soft layer, or wrong washer.
Count the threads. A nut should show at least one full thread beyond the top when tight. If the bolt is too short the end threads may be distorted which could cause the clamp to fall off. If it’s far too long, tool access may suffer, and unneeded length can vibrate and wear.
Listen as the joint works. Squeaks, clicks, or a new rattle are early signs. Catching them early beats repairing a torn hole later.
7. Quick fixes that actually hold
For a gate hinge on thin steel, use a washer each side and a mid-grade bolt tightened to a firm clamp, then a nylon lock nut. For a mower handle that loosens every weekend, clean the holes, add a larger washer, apply a drop of medium threadlocker, and tighten to a marked line. For a bike rack bracket that shifts, add a backing plate to spread the load and retighten in a cross pattern. These small steps turn a wobbly joint into a steady one.
What to Remember to Prevent Loose Bolts
Loose bolts are not bad luck. Joints come loose when clamp is low, parts can slide, or the lock fails. Always choose a matching bolt and washer combo. Select the correct size drill bit to drill the bolt’s size hole. Tighten the bolts in a uniform pattern to reach the correct clamp and install the appropriate lock. Keep water and grit out, and check marks after the first run. Do those things, and the joint stays tight, the rattle goes away, and the fix lasts.


